IBM Sterling B2Bi 6.0 Installation Instructions
Note: These instructions are specific to the GenuCom development environment. Customers will need to specify the paths and IP addresses that are specific to your environment.
Contents
Retrieve and Unzip Install Media
Installation Manager Installation
Prepare Silent Installation Response File
Configure Linux System Requirements
Error: Incompatible LANG setting
Error: Invalid Oracle IP address
Error: JDBC Driver version mismatch
Error: ORA-01950: no privileges on tablespace ‘SI’ 19
Error: ORA-01031: insufficient privileges. 20
Retrieve and Unzip Install Media:
1. The File install media for Linux is required to complete this installation. This can be downloaded from IBM Passport Advantage. Log into your customer account and search on IBM B2B Integrator v6.0 Download.
https://www-01.ibm.com/software/passportadvantage/pao_customer.html
2. Download and store the media file. I downloaded the B2Bi v.6.0 media for Linux from IBM in:
/home/SI/downloads

3. Unzip the installation package. I ran the unzip command on the B2Bi media zip as shown below:
Unzip B2B_integrator_6.0.0.0_MP_ML.zip
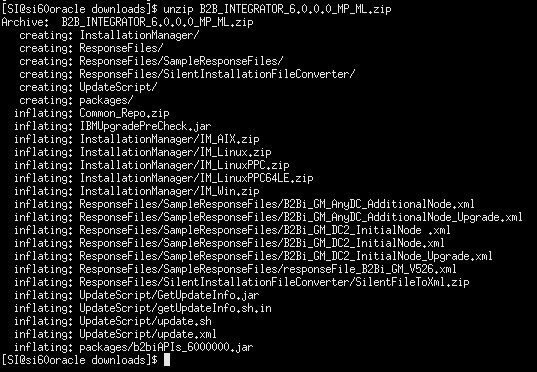
4. CD (change directory) into the /home/SI/downloads/InstallationManager directory created during the unzip of the B2Bi media.
5. Unzip the remaining zip files. The expanded zip archive contains other zip files. Two of the sub zip archives require expanding, these files and the unzip instructions are below:
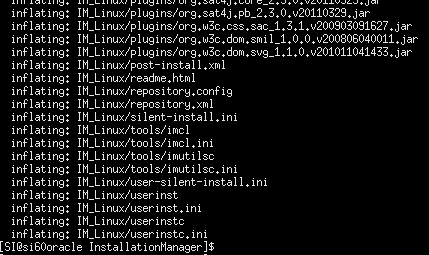
a. Unzip IM_Linux.zip

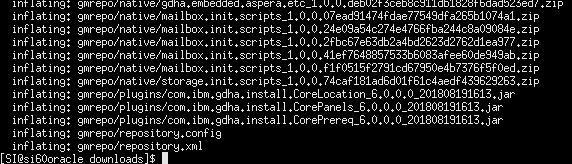
b. Common_Repo.zip

Installation Manager Installation
In order to install B2B Integrator, we first need to install Installation Manager software
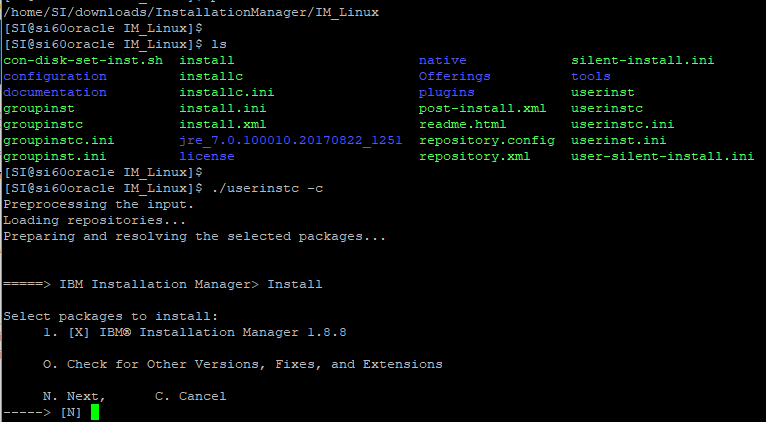
1. CD into /home/SI/downloads/InstallationManager/IM_Linux
2. Run ./userinstc –c from the command line as shown below
3. Follow the prompts as shown below for Installation Manager set-up.
4. Hit Enter to accept the default of N (next page)
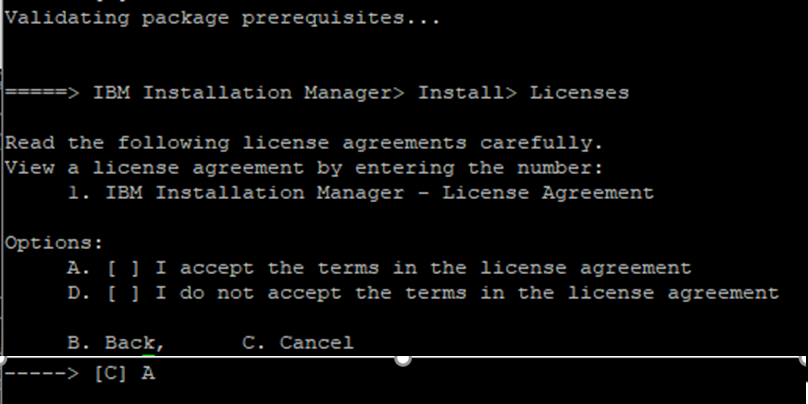
5. Type A to accept the license agreement (change default from C)
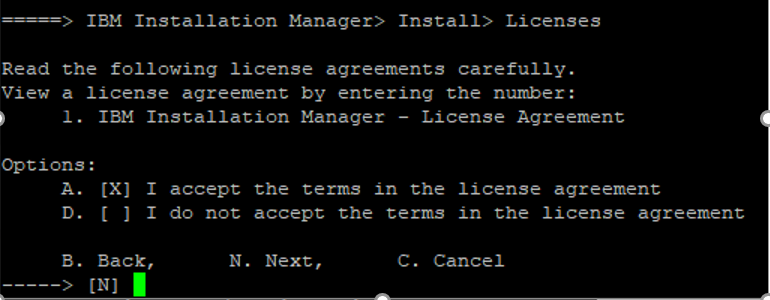
6. You will see the same License Accept screen, this time with A selected. Press Enter to go to the Next page to review the license agreement.
7. Review the license agreement. You can choose to read all the pages of the agreement by scrolling through these using selection D (page down). If you prefer to go to the end, select A (for All) and press Enter.
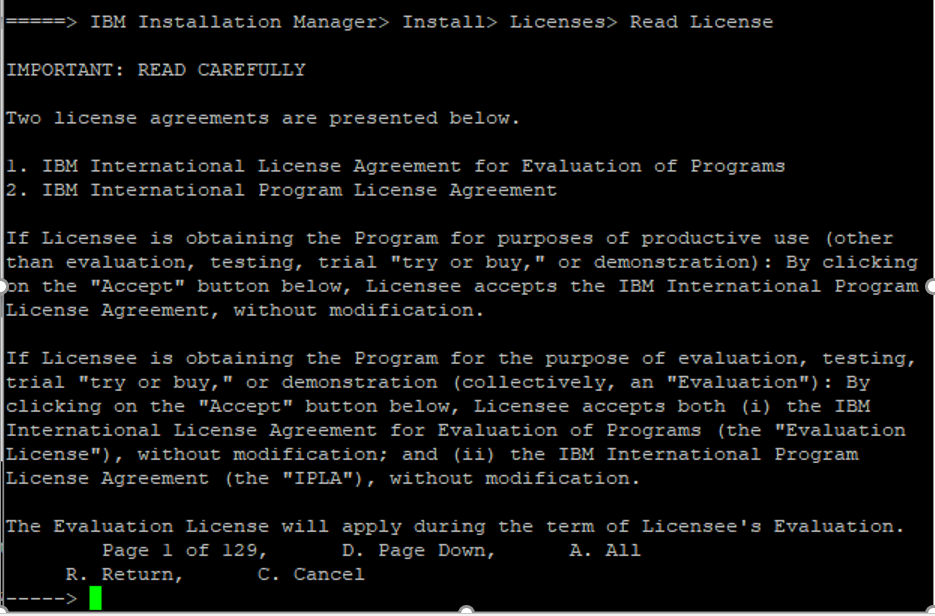
8. To complete review of the license, press R for Return.
9. Having reviewed the license agreement, you will be asked again if you accept the terms which is defaulted to Accept. Press Enter to select N for next screen.
10. You’ll see the default Installation Manager location. Press Enter to select N for next to choose the default location.

11. The installation summary screen will be displayed with the installation location and package to be installed IBM Installation Manager 1.8.8. Press Enter to select the default option to Install (I)
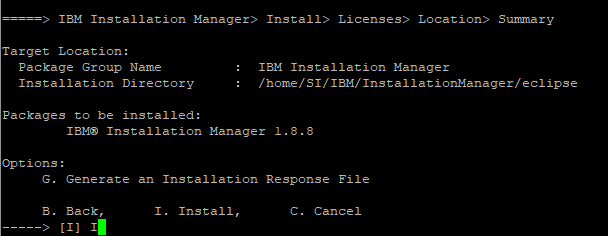
12. The installation process will begin and progress will be displayed. When the install is complete, press Enter to select option R to Restart Installation Manager.

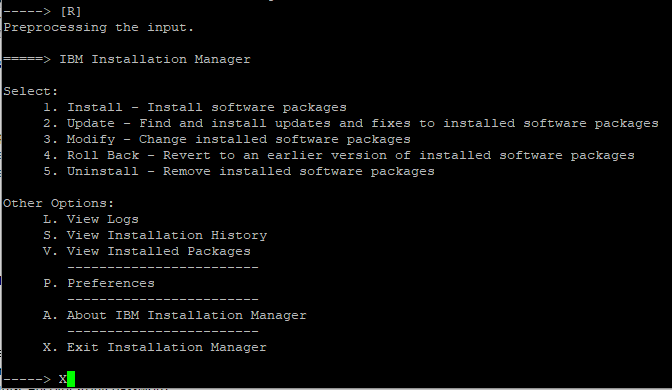
13. Upon restart the main screen for Installation Manager will be displayed. Select X for Exit Installation Manager and we will take the steps necessary to install prerequisite software needed.
Install Prerequisite Software
Java
Java is now bundled with B2B Integrator and is in the file you downloaded from Passport Advantage. These are the instructions that we used to set up Java.
1. Create a directory called java under /home/SI/downloads
2. Copy the bundled java zip archive into /home/SI/downloads/java
3. Unzip the bundled java zip archive
4. Use tar to untar/unzip the “ibm-java-sdk-8.0-5.15-linux-x86_64.tgz” file
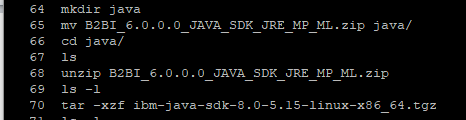
JDK 8 is now available under /home/SI/downloads/java for the B2B Integrator install
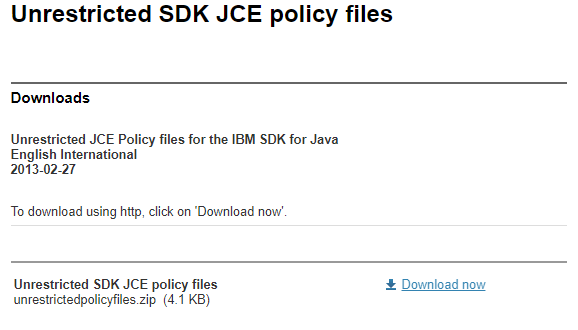
JCE
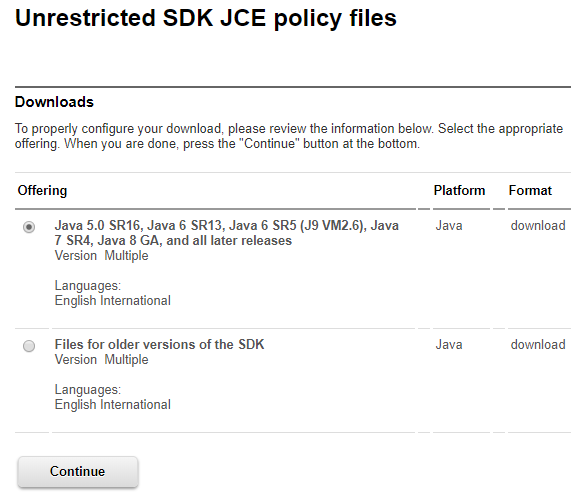
1. The Java Cryptography Extension (JCE) file can be downloaded from the link below. You will need an IBM account to be able to download the JCE file. Screenshots of the file to download are provided as well.
https://www-01.ibm.com/marketing/iwm/iwm/web/download.do?source=jcesdk&pageType=urx&S_PKG=13_01
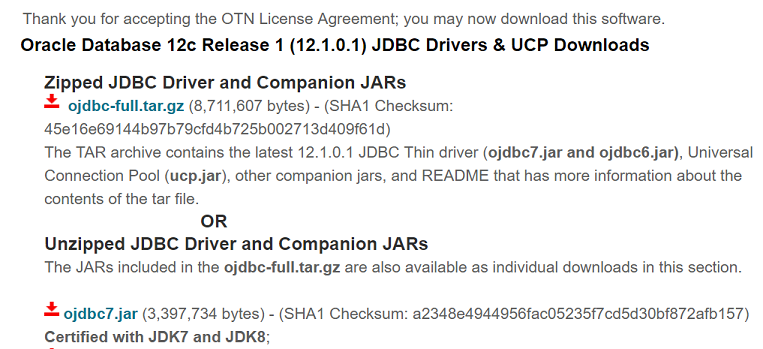
JDBC Driver
(ojdbc7.jar)
Note: The newer ojdbc8.jar Oracle 12c driver is not compatible with the supported JDK8.
- The JDBC driver for Oracle 12c database can be downloaded from the following URL. You are going to need an Oracle account for the driver download. Screenshots of the file to download are provided as well.
https://www.oracle.com/technetwork/database/features/jdbc/jdbc-drivers-12c-download-1958347.html
Prepare Silent Installation Response File
1. Prepare the file (response file) that contains the information the silent installation will require. Open the following sample file - we used this as our template: /home/SI/downloads/ResponseFiles/SampleResponseFiles/responseFile_B2Bi_GM_V526.xml
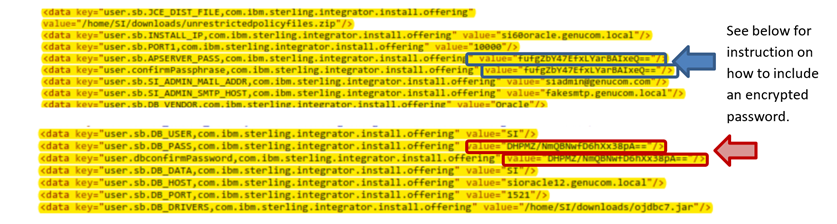
2. In the sample response file, we have modified the lines highlighted in yellow and have also removed comments. See below for the changes made. Modify the sample file as shown below using information specific to your environment.


For more information on modifying these parameters, see the link below:
Encrypted passwords:
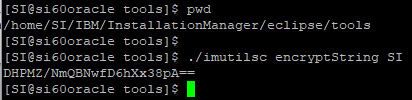
The silent install requires encrypted passwords in the response file for B2Bi and Oracle passwords. Use the encryption tool available in the /home/SI/IBM/InstallationManager/eclipse/tool directory to generate these passwords.
1. Use the following instructions to generate the B2Bi password (see screenshot below)
a. ./imutilsc encryptString password
b. Where B2Bi Passphrase: password (change this to the passphrase you want to use)
c. The following encrypted password is returned: fufgZbY47EfxLYarBAIxeQ==
d. Add this as the value specified in the blue outlines above.

2. Use the following instruction to generate the Oracle password (see screenshot below)
a. ./imutilsc encryptString password
b. Oracle user (SI) password: SI (change this to the Oracle password you want to use)
c. The following encrypted password is returned: DHPMZ/NmQBNwfD6hXx38pA==
d. Add this as the value specified in the red outlines above.
3. Once the changes in yellow are reflected in your file, save the response file to the appropriate directory. The response file we modified was renamed and stored as follows:
/home/SI/responseFile_B2Bi_GM_V60.xml
You can download the response file we used for the install at:
Configure Linux System Requirements:
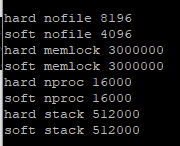
1. Use the following command to view to contents of the Linux limits.conf file

2. Add the following flags and values to /etc/security/limits.conf using “vi” or another editor: settings should be reflected -
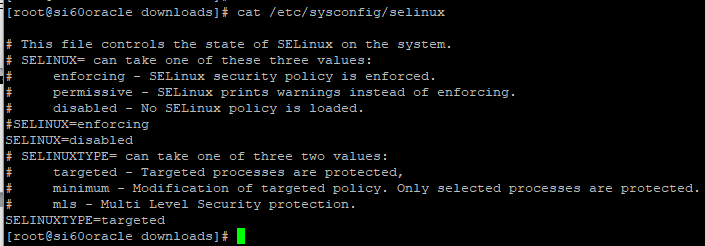
3. The SELinux state must be set to disabled for the install, and the SELinuxtype must be set to targeted. Perform the following commands to ensure this (see screenshot below):
a. Cd into /etc/sysconfig/selinux
b. Vi /etc/sysconfig/selinux
c. Set SELINUX=disabled
d. save selinux file
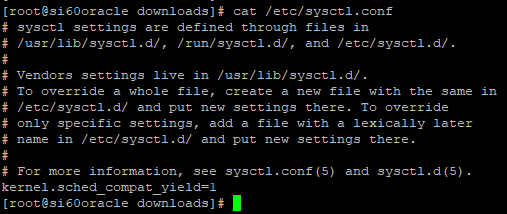
4. Enable Linux aggressive yielding behavior:
a. Cd /etc
b. Vi sysctl.conf
c. Add the following line: sched_compat_yield=1
d. Save sysctl.conf
5. Configure /etc/hosts file to meet IBM’s requirements as shown below:

B2Bi Install
The prerequisite steps have now been taken and we are ready to install IBM Sterling B2B Integrator.
1. CD into the following directory:
/home/SI/downloads/InstallationManager/IM_Linux
2. Execute the following command (make sure the response file is named and stored as indicated):
./userinstc input /home/SI/responseFile_B2Bi_GM_V60.xml -acceptLicense -log /home/SI/b2bi60-install.log
The installation could take an hour or more. Once complete, you will see the following screen:
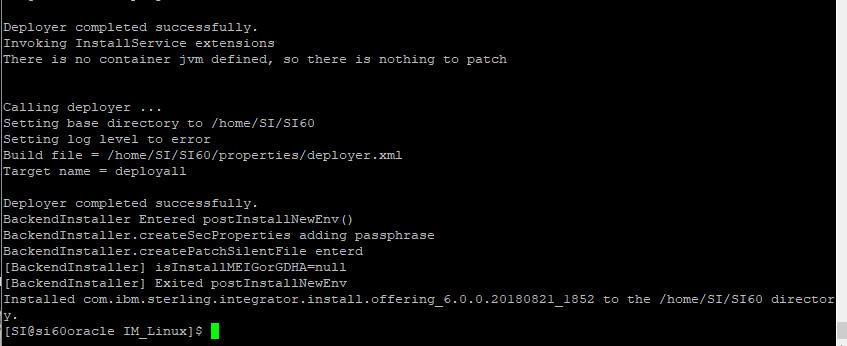
IBM B2B Integrator Installation is complete.
3. To start the application:
a. CD /home/SI/SI60/bin/
b. ./run.sh
Note: By default, port 10,000 is blocked by Linux. You can open port 10,000 by connecting to the application server as root and executing the commands shown below.

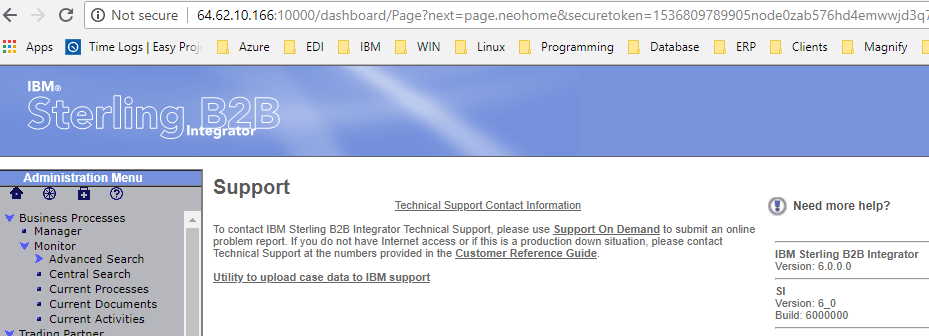
4. Now access the admin UI by going to
https://64.62.10.166:10000
Installation Errors:
Note: If the install fails in the middle of installation, check to see if the /home/SI/SI60 directory was created. Please delete the install directory before restarting the install.
Error: Installation Manager
Error:

Solution: Create the following:
/home/SI/IBM/InstallationManager/IBMIMShared


Error: Incompatible LANG setting
Error:

Solution: Set LANG value to:
en_US in /etc/locale.conf

Error: Invalid Oracle IP address
Error:

Solution: added Oracle server IP address to:
/etc/hosts file

Error: JDBC Driver version mismatch
Error:

Solution: the supported version of JDK is incompatible with the latest Oracle JDBC driver (ojdbc8.jar). Please use the version 7 of the Oracle JDBC driver (ojdbc7.jar).

Error: ORA-01950: no privileges on tablespace ‘SI’
Error:

Solution: Give Oracle user ‘SI’ unlimited quota to tablespace ‘SI’ – see below
Note: We used ‘SI’ for user and ‘SI’ for tablespace and we used ‘SI’ for the Oracle SID

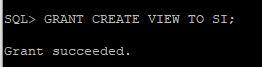
Error: ORA-01031: insufficient privileges
Error:
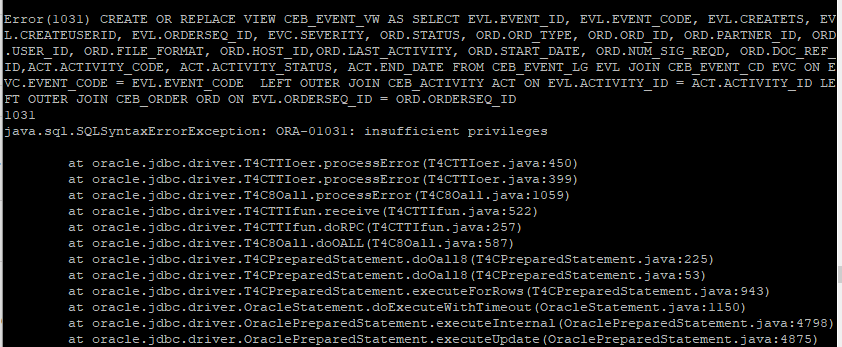
Solution: grant ‘CREATE VIEW’ access to the ‘SI’ Oracle user -see below